Team McKinky

Team McKinky

Friday, February 12, 2010

One big change we made at McKinky Manor about a year ago was to raw feed our dogs. I first heard about it through some other raw-feeders on a website I frequent. It is something I strongly suggest to people who are up for it. Why raw feed? Well, for one, kibble is probably one of the worse things you can feed your dog (especially brands like Purina or Beneful). It's made up of bone meal, and grains and vegetables. Take a look at your dog's teeth and compare it to ours. We have flat molars for chewing vegetables, but also canines for tearing into meat...we are omnivorous. Dogs have NO flat teeth -- their teeth are designed for ripping and tearing...carnivores. So basically any grains and veggies they eat will go straight through them and they get little to no nutrients from kibble. That being said, we've been known to feed the girls pumpkin or squash if they seem to be a little...ahem...backed up. The fiber is great for moving things along. We have found that with raw feeding, the dogs rarely need to be bathed, they don't smell like "dog," they are much more energetic, and raw feeding is even said to extend the lifespan of the dog. Best of all, we never have to brush their teeth. As kibble-fed dogs get older, their teeth become brown and start rotting and falling out. They get gum disease. Marley and Abby's teeth are SO white now it's unbelievable. The bones that they eat scrape all the gunk off of their teeth and are natural teeth cleaners.

Marley and Abby are fed about 2% of their weight (they are each about 50 lbs, so we feed them each approximately 1lb of meat each day). The recommended amount is 2-4% of their body weight, but after a few weeks, you get a better idea of what amount is best for them (ie. if they start getting chunky around the hips, you cut back on the food).


At first, I was really grossed out by handling raw meat, but you really get used to it. And we've found that it's about the same cost as buying good quality brand food, it just doesn't get a lot of marketing. We get it in bulk at the Farmer's Market and freeze it, and the great thing about that is they will cut it up at the market for us, so that takes out a lot of the handling of the meat. If you freeze it after you get home, there is far less juice (juicier meats usually = not as fresh). When we get home, we separate the meat into baggies for each day for our 2 dogs, that way we just grab a bag for the day, and dump the meat out rather than handling it then as well. They eat chicken, eggs, turkey, beef, bison, sardines, tilapia, goat, lamb...whatever is on sale! They must have all of the nutrients from the animal (if they were in the wild, they would eat the whole thing), so we give them all the different parts -- meat, bone, liver, kidney, heart, etc. They eat their fish whole (guts and all). RAW chicken bones are prefectly fine for dogs to eat -- they are very rubbery. Cooked chicken bones are NOT okay -- they are dry and can splinter off in the digestive system, causing damage.


Our dogs don't keep food in the bowl either, so we feed them outside (they don't care about dirt or leaves on the meat). They LOVE it, although it took them a little while to get used to it (raw meat doesn't smell as strong as kibble). Here are a couple of really good websites:
http://www.rawlearning.com/
http://www.rawfeddogs.net/
Thursday, February 11, 2010

Baby Ella


Well, this is a couple of weeks late, but welcome to the world Ella Grace Deegan! She was born January 29, 2010 - 20.5 inches, 8.10 pounds!


Sean and Callie are so happy to be parents, and they love their little girl so much! I made Ella a quilt, which was a surprise to them. Unfortunately, my sewing machine is in a box somewhere, so I wound up hand-sewing the quilt...took a little longer, but it was a lot of fun! And this was my first time doing a ruffle on anything, so that was interesting -- didn't turn out too bad, eh?


Even though Callie wasn't going for the "pink" theme with the baby, she knows it is Aunt E's favorite color and of course anything Ella gets from Aunt E is going to be pink! The toile fabric has little nursery rhyme designs on it, matching the nursery rhyme themed Baby Shower Callie's mom threw for her a few months ago. And the backing on the quilt is a soft flannel:

Wednesday, February 10, 2010

Happy Place!

I just had to write a quick post on my new happy place: organize.com. Even though everything at the house is a messy construction zone right now, I love to find things I can use to organize everything. Check out this ADORABLE cookie jar:
http://www.organize.com/cupcake-cookie-jar.html

Or how awesome would this be in the kitchen to organize bills and hang aprons from?
http://www.organize.com/cubby-wall-mount-organizer-espresso-umbra.html


D might have to drag me away from the computer now that I've found this website...

Tuesday, February 9, 2010

super cheap headboard in a day project

We tried to fix our amateur DIY headboard recently and promptly broke it, so we got some inspiration and decided to start from scratch.


We picked up this door at an antique store for $25

It was majorly dirty so mrs. mckinky fell into her gender role real nice by cleaning it up for us.

We also got this antique doorknob at the same store for $12


Really dirty

Next we attached the doorknob. Not as easy as it sounds. The hardware on the knob didn't line up with the holes on the door. Fortunately, we only wanted it for cosmetic reasons, so we just took the hardware out and glued the thing down.

Liquid nails didn't work at all (go figure) so we went with a 2 part epoxy and it stuck like crazy.

The door is 22" wider than the bed, so we measured 11" in on each side to make sure the legs wouldn't show.

We used scrap 2x4's that we had laying around leftover from another project, cut them down so they would be 2" below the top of the bed, and attached L-brackets to either side.


Then mr. mckinky took up his gender role and screwed them onto the bottom of the door (much measuring, marking and pre-drilling went on before this picture was taken.)

Our wood (being scraps) wasn't all the same color, so we put the odd colored one in the middle to make sure it never peeked out from behind the bed and ruined the effect.


We then attached loops to sit in frame hooks we were attaching to the wall, to keep the thing from wobbling forward.


We bought these stair rails to act as cosmetic legs, thinking they would match

Massive holes had to be drilled for the pegs on the end of the legs to fit in. It took forever and it started pouring at about this time.

Finished product:

Mounted up...the cosmetic legs didn't look right and didn't wanna stay in place, so we scrapped them. Maybe later we'll paint them a better matching white and secure them better, but for now...

And made up...


Total cost including all materials (used and unused): around $60 (real rough estimate)

cheap-as-free compost bin

So, we're both pretty inexperienced with composting (and some of us don't like to get dirty...) so we found this very easy, very cheap compost bin project and went for it. Basically the only material investment required is a big plastic bin ($7 or so at the hardware store, or free if you dumpster dive, we went the store route this time.) Here goes.

1.) Drill 8-10 holes in the bottom of the bin (for aeration purposes)

2.) Fill it up about 1/4 full with either newspaper scraps or leaves (we have a lot of both, so I did about half & half.)


3.) Pile dirt on top of that to about 1/2 full.
(Optional): We found this cookie jar at hobby lobby so we could have something presentable to hold the food scraps before we took it out to the bin.
Slapped a carbon filter in the lid to keep the stink to a minimum...
And now whenever something goes bad or we have scraps, we can just throw them in here until it gets full and we take it out to the real heap.

4.) Put your scraps in and mix so they're completely covered. At this point you're supposed to spray the mix down with a little water to aid in the breakdown, but since our yard has been swamped for the past 3 months, our dirt was plenty juicy already.
5.) Attach the lid and drill 8-10 holes in that as well.

6.) Lug the bin somewhere out of the way, preferably out of direct sunlight, as too much heat will dry the compost out. I put it next to all the other trash & recycling things so we can take everything out to the same place at the same time.
Lesson learned: If you're gonna use mud like I did, maybe move the bin first. Thing was heavy.
List of compostable/noncompostable items:

Monday, February 8, 2010

It's so easy being Green

D has finally done what he's been joking about doing since we met 6 years ago. He's turned me (well, at least halfway turned me) into a hippie. It all started off with raw-feeding for the dogs, and has since continued on to green cleaners, rain barrels and compost bins (more to come on those topics later). Now, I certainly wouldn't say we're anywhere near to the extremes some people go to, but we've definitely jumped on the "green" bandwagon. After all, every little bit helps.
Here are some super cheap "recipes" to make and eco-friendly (MUCH better for use around kids or pets, not to mention for yourself)! Probably the one that is the most time consuming to make is the detergent, but even that isn't hard! Label your bottles well so that they don't get mixed up!

-Anything saying Vinegar is for WHITE DISTILLED (can be found anywhere in big jugs)

-Borax can be found at any store in the Laundry aisle -- it's in a cardboard box called "20 Mule Borax"

-Dr. Bronner's can be found at Whole Foods, vitamin stores, I've heard it's at Target in the beauty section, or ordered directly from their site (it's a vegetable-based soap, rather than a fat-based soap, so it doesn't leave residue behind)

-Arm & Hammer WASHING SODA can be found at Ace Hardware or ordered online -- MUST BE WASHING SOAP -- cannot just use baking soda or Arm & Hammer Detergent (has to be 100% sodium carbonate to work as it should). I did actually find some at Publix the other day, next to the Borax -- it'll be nice to not have to order it in the future.

**All-Purpose Cleaner (like 409)**

1 part Water (use warm water when first mixing, mixes the soap better)
1 part Vinegar
1 Tbsp Dr. Bronner's Castile Soap

Pour Water and Dr. B's in a spray bottle, shake well. Add Vinegar (use half & half with the Vinegar and Water).


**Glass/Mirrors/Tile/Toilet**
Vinegar + a few drops Dr. B's in a spray bottle.
-For glass and mirrors, wipe using newspaper, and follow up with a Vodka wash for extra shine
-For Toilets, first sprinkle the toilets with Baking Soda, then spray on Vinegar Mix (should start bubbling and sizzling), then scrub.

**Sinks**
Hydrogen peroxide. Spray in sinks, once it stops bubbling, just wipe down.

**Dishwasher Detergent**
3 parts baking soda
1 part Borax
4 small packets UNSWEETENED Lemon-flavored Kool-Aid

Mix and store in a jar. If you have hard water, the citrus in the Lemon Kool-Aid cuts through that scum that is left behind.

**Dishwasher Cleaner**
Pour 1c Vinegar in the bottom of dishwasher and run on empty.

**Scouring (Comet or Ajax)**
1/4 c Baking Soda
1 Tbsp Liquid Detergent
2 drops Dr. B's
Store these in a container. When ready to use, add small amounts of vinegar to make a thick but creamy texture (good for tubs).

**Drains (Drain-O)**
1 c Baking Soda
1 c hot Vinegar
Pour B-Soda down sink first, pour vinegar down after. Let sit 5 mins, then pour HOT water down drain.

**Microwave Cleaner**
1/2 c Vinegar
1/2c Water
Put in microwave-safe dish and microwave until boiling. Then just wipe down the inside of the microwave -- gunk comes right off.

**Laundry Detergent (Liquid)**
4c hot water
1 Dr. B's soap BAR
1c WASHING soda
1/2c Borax
5gallon bucket (Home Depot)
Essential Oils
Grate whole soap bar and add to saucepan w/4c water. Stir continually over heat until soap is melted. Fill bucket halfway full with hot water. Add melted soap, Washing Soda, and Borax. Stir well to dissolve powder. Fill bucket to the top with more hot water. Stir, Cover, let sit overnight. Next day, stir again. Pour into a bottle (ex. a clean empty old detergent bottle) halfway. Fill the rest of the bottle with hot water. Add 10-15 drops essential oil for ever 2 gallons of detergent once it is in smaller bottle. Shake well before each use (detergent will gel up). Use 5/8 c per load for a top loader (~180 loads), 1/4 c for a front loader (~640 loads). Makes about 10 gallons detergent total -- can half recipe.

**We also use Borax instead of bleach when washing whites (works GREAT) and Vinegar as a fabric softener -- it's safe to use on towels (won't strip them of drying capabilities) and doesn't leave any residue behind. Just pour the vinegar in the fabric softener cup before washing or add to the rinse cycle.** Oh, and I LOVE this website:

http://www.vinegartips.com/Scripts/

Friday, February 5, 2010

Food Friday!

Fridays sound like a good day for a new recipe, huh? Some of these are old, some are newer, some we've never even tried out yet. I will try to post specific instructions for those of you that don't normally cook, or have trouble doing so. Odds are, I will probably never post recipes for a dessert, since it is my ultimate goal to open up a bakery (Fat Kid Bakery) -- and a good baker never shares her secrets! According to some people, I make some pretty good cakes and cookies -- feel free to request anything; I love to experiment. Maybe someday we'll create a website and link it up on this blog!

Anyways, the recipe I'm going to share today is something D & I have used for ages. It is for breakfast burritos, that are amazingly delicious. The recipe calls for a lot of ingredients, but for most of them, you use the whole item (for example, a whole onion is chopped as opposed to only half). We make tons of them and wrap them up for breakfast for the week, or freeze them for the future. This recipe yields approximately 20 burritos. Feel free to halve or quarter the recipe if this seems like too much!

Breakfast Burritos
-2 packages (22 1/2 oz. each) frozen hash brown patties
-15 eggs (large eggs)
-2 Tbsp garlic salt
-1 Tbsp chili powder
-1 Tbsp Cumin
-1/2 lb chicken (we love to get the already-cooked rotisserie chicken at Kroger, and just shred the meat from the bone. You can also use sausage, ham, turkey, or bacon if you prefer these)
-6 jalapenos, minced (cut into very very tiny pieces)
-1 large green pepper, diced (cut into very small pieces)
-1 large onion (white or yellow), diced
-1 bunch green onions, diced (remember, only cut the green part of this!)
-3 cups salsa
-1 pkg flour tortillas (medium size torts, not the super huge ones)
-4 cups cheese, shredded (my favorite combo is colby & monterey jack cheese)

Bake hash browns as instructed on package. Once finished, chop into crumbles. Keep warm. In a bowl, whisk the eggs (if you don't have a whisk, you can use a fork!), chili powder, garlic salt & cumin. In a large skillet, saute jalapenos, green pepper and onion (saute = fry up in a bit of butter until the edges are browned and ingredients are soft). Stir in chicken (or other meat). Add Egg Mixture. Cook until eggs are set, stirring constantly. Stir in salsa and hash browns. Over a burner, or on a pan, warm tortillas -- it makes them malleable for folding. Spoon some of the mixture onto the tort, and add the cheese. Roll up (fold bottom of circle up about an inch or two so that nothing falls out of the bottom when you eat it, fold left and right sides of circle over each other). Wrap these burritos individually in foil. To serve, unwrap and bake at 350* for 50-55 minutes, or heat up in the microwave (withOUT foil!) until warm.

I'll post a picture of these the next time we make them!

Thursday, February 4, 2010

Peace Realty, Inc

I just wanted to write a quick blog about our good friend and contractor, Thomas Paz. He is the owner of Peace Realty, Inc, and has been in charge of the Master Bathroom Remodel. Not only does he charge a fair price, but he does EXCELLENT work. Everything he has built is extremely sturdy and durable -- and doesn't look too bad, if I do say so myself. If you ever need anything (and I mean anything, this guy also does roofing and french drains), I strongly recommend Peace Realty. Hopefully he'll create a website soon so that I can add it to our blog. I can't wait to post a few pictures of the newly remodeled Master Bathroom so you can see his work! Hopefully by the end of this weekend, we'll have it painted. That, and hanging the shower door and putting up some mirrors -- we're almost there!

Wednesday, February 3, 2010

Our New Home

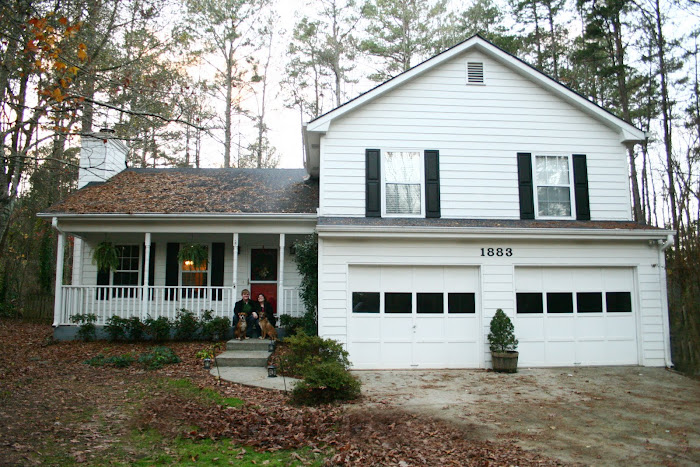
Well, here is our first blog, started after very little convincing from our friend, Rachelushka. We're hoping to post about all of the different types of things we have done to the house (ourselves, or using other vendors). We might also include some crafty things that we (and by we, I mean "I") do far too often...perhaps recipes, book recommendations, etc etc.I suppose as the blog is about our home, I should start by adding pictures and such. So, for your viewing pleasure, here are the "before" pictures of the house:

This is a view of the basement bathroom -- we plan to get a new vanity, sink, lights and paint that ugly blue (the blue doesn't look so bad in this picture, but trust me, it's bad).


Really weird view of part of the master bedroom...but it has a tray ceiling, and the walls are not that pale yellow.


Here is a view of the family room:


Half of the backyard:


Other half of the backyard:


Now, here are the updated pictures on what we've done (if it looks like a construction zone, that's because it is right now!)-- this first blog has turned into more of a photo album!

Walls painted a medium brown with a hint of gold. We also removed the Pergo, and had Alberto Navarrete come in to do the beautiful hardwood!:


Here is one view of the basement, in total disarray:


And another view. We're missing some sheet rock -- we had the house re-piped by Alan Foster Plumbing, with PVC piping (it was previously polybutelene, which was very popular in the '90's, but has been found to burst randomly -- no fun):


Here is a picture of the lovely soon to be laundry room (with our new HVAC system, installed by Cajun Air):


Here is another view of the basement bathroom:


Guest Room:


Hall Bathroom:


A peek at the Master Bedroom:


The outside of the Master Bathroom. What started off as a project to wall up around the toilet to turn it into its own room, turned into total demolition and total remodel. The big gap on the left used to be the door. Everything was switched around, and the door is now on the right!:


Here is some of the framing around the new toilet room (aka Water Closet):


Basement, prepping the floor -- we decided to stain it, but that will get its own post later!


Part of the fence my dad and brothers came to build...we helped, but my dad is amazing at this sort of thing (as you can see!):


The left side of the fence (finished!):


I'll post more pictures later, along with our rave review for our contractor, Thomas Paz. He's done an amazing job and I can't wait to tell and show you more!