Team McKinky

Team McKinky

Thursday, January 19, 2012

A Very Vermonty Trip (plus NH, ME and MA!)

Back in March, we took a road trip through New England...in a weekend. David was working up in Connecticut for a few months on a big project. So he would either come home on weekends, or I would fly up there to go on a mini adventure. So, I arrived at White Plains airport at about 10:30pm one Friday night (thanks, Delta, for your wonderful flight delays!) and we drove up to Montpelier, Vermont. The drive took a total of about 5 hours, and we made sure to stop at the Welcome Center after we crossed the state line to Vermont. Just about everything was closed, of course, but we were able to find this great sign:


Apparently, they take their syrup very seriously in Vermont! Important side note - David and I tend to get pretty goofy when we are on the road. One of my favorite movies is 'White Christmas.' So we spent the whole trip to and from Vermont either quoting the fabulous line "Vermont must be beautiful this time of year....all that snow!" or singing 'Snow' together - horribly off key and obnoxiously loud. Good times. We got to Montpelier (or, to be more precise, Barre) at about 3:00am, and made our way to the Yellow Farmhouse Inn. It was a beautiful Bed & Breakfast, owned by a very sweet couple, Sandra and Mike, who were originally from Boston.


They cooked an amazing breakfast, and Sandra even passed along her recipe for Cream Scones, which have been a great hit the past few times I have made them! After we had breakfast and packed up, we headed out on the town. Montpelier is the capital of Vermont, but it is tiny!


Our first stop was the Ben & Jerry's factory, just outside of town. We love Ben & Jerry's - not just because they make delicious ice cream, but because they are so eco-friendly (they use local cows for their milk) and have a great sense of humor in addition to being super laid back. They have an ice cream 'Cemetery' for all of their retired or failed ice cream flavors.


After the factory tour (which included a free sample of ice cream, gift shop, and huge ice cream shop), we headed to the Morse Farm Sugarhouse. They didn't have much by way of an official tour, but we walked around and saw the lines from the Maple trees (draining the sap and transporting it from the trees to the sugar house), and then we were educated on the process of making syrup. Apparently it takes quite a bit of sap to make even a small amount of syrup! The sap has a high water percentage (about 98%), and so it has to be boiled off for several hours to evaporate the water. In the gift shop, the Sugarhouse had a row of syrup bottles which are sold commercially, and are not 'true' maple syrup. We had no idea! Mrs. Buttersworth, Log Cabin, Aunt Jemima, Eggo are all 'fake' syrups (they are only 'maple-flavored'). So we were sure to bring a big jug of syrup back with us - and it is DELICIOUS.


Part of my excitement at visiting the Sugarhouse stemmed from my love (okay, obsession) with "Little House in the Big Woods." In Laura Ingalls Wilder's first novel, she describes not only the sugaring season, but also the treat that followed - sugar on snow. I have always wanted to try this (when it snowed last year, I attempted to make it, however it was a flop. I later discovered that since we didn't have pure maple syrup, it just didn't work out). Not only did Morse Farm have sugar on snow, they also had homemade doughnuts and coffee. The sugar on snow was fabulous. As soon as the hot syrup hit the snow, it carmelized. YUM! We also shared a cone of 'maple cream' (ice cream). We had such a great time in Vermont - not only was it fun to explore the different areas, but the scenery was beautiful. Mountains and hills covered in snow.


After our Vermont morning/afternoon, we drove through White Mountain Park in New Hampshire. Again, more beautiful views. We kept seeing signs for Moose, but unfortunately didn't see a single one.


They did have a pretty cool display about the local beavers:


Not long after our drive through the top of New Hampshire, we arrived in Portland, Maine (this was Saturday evening, at this point). Per our friend, Rachel's suggestion, we had dinner at 'J's Oyster.' Since we were in Maine, we had to try the lobster. Neither of us were big lobster fans before having eaten it, and afterwards (although it was delicious), realized it was a little too much work for not much payoff. The oysters were quite good as well.


Our final stop on the trip was Boston. We got in at about 10:00 that night, and checked into our hotel. The hotel shuttle was nice enough to take us to Faneuil Hall, where, at my dad's suggestion, we visited the Black Rose Pub and walked around. We were both so tired at that point though, we did little more than have a drink at the pub and head back to the hotel. The following day, we had until about 2:00pm to run aroud Boston before we had to head back to White Plains to catch my flight.

We had breakfast back at Faneuil Hall, at the Black Rose Pub. I had myself a full Irish breakfast, which was most excellent. I did avoid the white and black puddings, though!


After breakfast, we followed the Freedom Trail through the city to visit the historic sites. The trail was marked off by a red line.

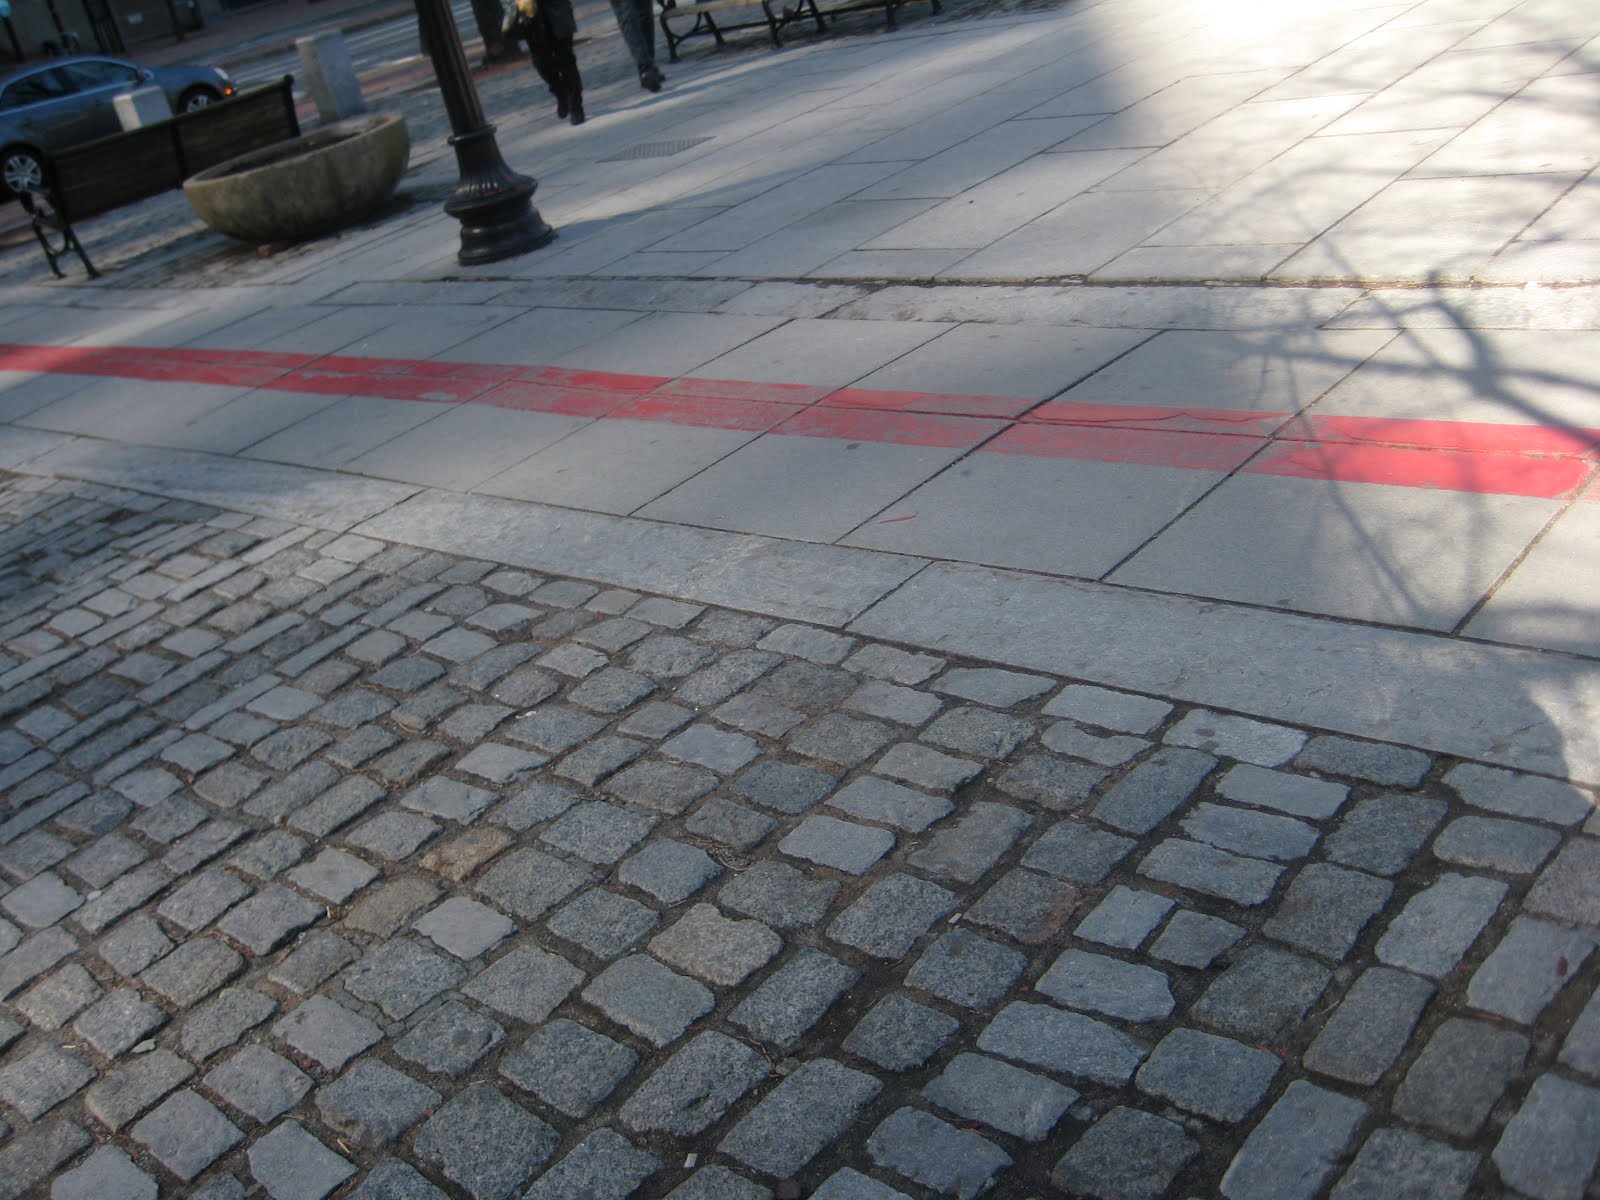
We saw The Boston Common (the country's oldest park), the capitol building, Granary Park Burial Ground (where Paul Revere, John Hancock and Sam Adams are all buried).


And the site of the country's oldest public school, established by Benjamin Franklin:

Unfortunately, we didn't get to complete the trail, but on our way back to the car, we stopped at Regina's Pizza at Faneuil Hall - highly recommended by my dad. It was hard to say which was better - Ray's pizza that we had in New York, or Regina's. Amazing!

On our way out of town, we stopped in the Russian District, and had some great Russian food at Cafe Stoli - potato latky, and Vareniki.

After our Russian experience, we drove back to White Plains so that I could fly home. It was an exhausting weekend, but we had so much fun in the four states we visited! We would love to go back for another visit someday - hopefully for much longer next time!

Saturday, January 14, 2012

We're Back! Maybe. And 'How to Make an Earring Holder'

Well, it's been about a million years since we posted last, but now that I have a laptop, I think we might actually be picking back up on this blog! Don't quote me on that...I am really bad about uploading pictures, so we'll see what happens. Assuming we stay on top of this, we have a plethora of old crafts, improvements and trips to post.
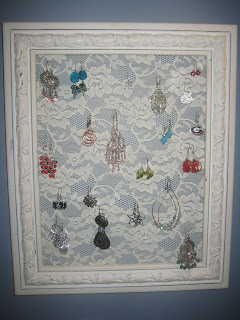
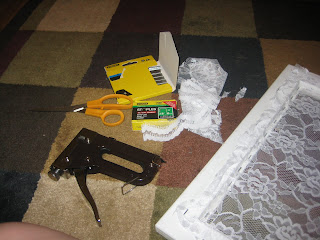
I finally got around to making an earring holder for all of my earrings. I bought an empty frame from Hobby Lobby and some lace. I used my staple gun to first staple the lace to the back of the frame, and then pulled it tighter and stapled the inner part of the back of the frame (where the glass would normally lay).
After completing that, I realized that the white lace looked TERRIBLE with the cream frame. Luckily, I had some 'Antique White' spray paint from an old project. I taped up the frame, and then spray painted the lace to an off-white. It matched perfectly! Even better, I think the coat of paint might have reinforced the lace threads.
Once that dried, I hung the frame up on the wall, and hung my earrings up. They are now up and on display, and easily accessible!

Thursday, April 1, 2010

septic debacle pt. 1 - the problem


one of the biggest issues we've faced at mckinky manor is the septic tank. it failed on us about a month after we moved in, and started backing up into the basement. we hired a company to come out and pump it and see if they could fix it. long story short, we paid $1400 for the to pump it and tell us we'd have to get a permit and do a complete rework of our septic system. awesome.


so we went to get the $250 permit, and they told us to get a $300 soil test. for those of you keeping score at home, at this point we're up to almost $2000 and still haven't started work on the actual solution. to make matters worse, the soil test came back with the equivalent of straight f's on our land's report card. they say that none of our land is any good for septic. why they built here in the first place with no usable soil is another story for another day and doesn't help us out one bit today.


so...the soil test guy gave us a few options to send around to septic contractors to get quotes on. we did so, and the lowest price we got was $11,400. that's before disposal fees, and electrician costs. so, we're looking at 13,350 total. fast forward three months and the gwinnett county environmental health department has denied every single plan our contractors have submitted for one reason or another, so even if we had the time and money to devote to this thing, we'd still be held up by them. to top it all off, they had the audacity to suggest that we get another $300 soil test just in case the ground changed significantly during the 3 months worth of foot dragging and lolly gagging they were doing.

on top of all that, we have major drainage issues in our yard. the soil is constantly soaked because of the heavy rainfall we've had lately, and the water from the entire neighborhood flows to a retention pond adjacent to our property which is fed directly by a creek running along our property line. the pond and creek have overflowed and crept up several feet, which of course, raises the water table in our yard (one of the obstacles to getting work approved.)

drainage issues in our yard...
1.) the beginning of that glorious creek. that pipe is never supposed to have standing water in it...it's about 3 feet deep at this point.

2.) this is supposed to be more or less dry, at most a trickle. notice the trees growing out of the water? ya, they're actually not supposed to be in the water at all.


3.) one of the many sources of groundwater moving (and i use the term lightly...) directly across our property
4.) and here you see the water moving across our driveway. this is after a relatively light rain. it's a few feet wide when it pours, which it has been doing a lot lately.5.) as you can see...


to be continued...(cue tense music)

Wednesday, March 31, 2010

A Curtain for the Kitchen

Here was last night's crafting fun! A Roman-style curtain for our one Kitchen window. This project took a little longer than I expected, but the end result didn't turn out too bad. Here are the supplies I needed:


I used red burlap fabric (1 yard, which was more than enough), a white grosgrain ribbon (wide, and an entire spool), my iron and ironing board, scissors, a curtain rod (of the suspension variety, since the window area is a little too tight to hang a real curtain rod), measuring tape, and a roll of Heat N' Bond.
The window is 31 1/2 inches wide, and we didn't need to measure for the full length of the window, since the curtain is decorative, not functional. I figured that I wanted it to go down no more than 12 inches, but because I was doing a Roman-style curtain, I needed to go cut the fabric longer (to compensate for the folds of fabric). The Heat N' Bond is just an easy, no-sew option -- the roll is 3/4 of an inch wide, so because I was hemming the sides of the fabric to hide the raw edges (see below), I doubled that to make 1 1/2 inches on either side. So, if you follow that, the width of the fabric was 34 1/2 inches (window width + left and right sides).

Here, I hemmed around three of the sides of the fabric. For the fourth edge, I estimated how wide the loop needed to be to slide the curtain rod through, and folded that edge over, creating a sort of pocket. Next, I attached two strips of ribbon vertically to the front of the curtains, each about 8 inches from the edges. The Heat N' Bond didn't work out so well here, because when the goop melted to bond the fabrics together, you could see a dark spot under the white ribbon. So, to keep the ribbon from flopping around, I stitched little X's along the ribbon that could easily be hidden when I did the folds. Unfortunately, I'm not so good with remembering to take pictures for each step, so this might sound a little confusing! Next, I loosely folded the fabric in a sort of layered fold to do the "Roman" part of the curtain (see final picture for what this looks like!) and pinned the folds down (because my curtain was so short, it was only 2 folds). I Heat N' Bonded those folds to each other, and stitched along the edges, so they would be secured. Then, with the extra ribbon, I made little bows:
These were stitched onto the ends of the white ribbon that goes vertically along the fabric. And that was it! I slipped the curtain rod into the pocket I'd made earlier, and asked D to pop it into the window frame (I couldn't reach, and at 6'6," he's perfect for reaching things that are too high. He has no problem asking me to get things that are "too low" to make up for it). Here it is:
There are a couple of minor things I'll need to fix on it to make it look better, simply because if I don't I will go crazy, but hurray! We have a curtain in our kitchen now!

Friday, March 26, 2010

Sips n' Strokes

I had a pretty awesome time at Sips N' Strokes with some of the girls the other night. I think this might become a frequent activity -- I'm no artist by any means, even though I love to do artsy type things. But it was a really relaxed, fun environment, and the instructor did a great job showing us how to paint step-by-step. Our paintings turned out pretty well -- we did an "Abstract Guitar," and enjoyed a bit of wine along the way (this was after a dinner full of Margaritas over at El Azteca!).
Here's the bestie and I mid-painting:


My final painting:

I LOVED Christina's...she went against the norm and used a palette that matched her bedroom colors (pinks and grays):
And here were a few of the other girls' paintings:
Pretty cool...I think we're going to go back soon -- and yet another "masterpiece" will fill our bare walls at home! Or maybe even a Birthday or Christmas gift one day...

Wednesday, March 24, 2010

Turtle Power!


We cooked some homemade pizza last night and watched TMNT II: Secret of the Ooze (brought back so many memories!). Here's the recipe we used (although we mostly just winged it!). I'm still looking for a good pizza crust recipe, so I just got a store-bought crust for last night. You can use any toppings you'd like, here's what ours consisted of:

Margherita Pizza

1 can Pillsbury Pizza Dough (Thick Crust style, found near the biscuits)
Olive Oil (3-4 Tbsp)
Shredded Mozzarella cheese (as much as you like, we used about 1-2ish cups)
2 Vine Tomatoes
Half a cup of mushrooms, sliced (more or less, depending on your preference)
1 Avocado, sliced
3-4 leaves fresh basil, chopped

Preheat oven to 425*. Pop open can of dough, and unroll -- it should be in a rectangular shape. If it keeps shrinking, let it set to room temperature -- that should reduce shrinkage. Spread Olive Oil from the center, all the way to the edges (it'll make the crust crisp). Scatter cheese (NOT to the edges). Slice tomatoes to desired thickness (ours were pretty thick) and arrange on pizza. Sprinkle with mushrooms, avocado and basil. Bake 20-25 minutes, until crust is golden brown. You may need to eat this with a fork and a knife, depending on how heavy your toppings are!

Wednesday, March 10, 2010

Basement Staining Hell

One of our many projects before we moved in included replacing all the flooring in the house. We found really great deals, either through Thomas Paz or where I work, it was within our budget, and frankly, I'm not a big fan of breathing in other people's dead skin.


The house had been mainly carpet, with lino in the bathrooms and part of basement, and Pergo (fake hardwood) on the main floor. The carpet was disgusting -- filthy and old. When we pulled up the carpet and padding (we did this ourselves to save money), there was so much dirt and grime, it made us seriously reconsider ever having carpeting again. Buuuuut, we prefer to have it in the bedrooms (I hate cold floors at night, and I'm not a big fan of rugs). SO, we had Alberto Navarrete come and install hardwood (oak, with a cherry stain) on the main floor and stairs, as well as the upstairs hallway. Foster Enterprises came in to do the carpeting in the three bedrooms (we did a Frieze carpet -- sort of a shag -- in a multi-color). Dave Grashorn came and tiled all three bathrooms, the shower and tub surround in the master bathroom, and our laundry room. The only thing left for us to do flooring-wise was the basement. It was suggested that we refrain from installing hardwood or carpet in the basement (just in case it flooded -- with the laundry room & water heater down there, you never know!). I'm not a huge fan of tile in a big room like that, so we started looking into other options. We found out about concrete staining (http://www.concretenetwork.com/stained-concrete/sawing_and_patterning.htm). This is a really cool look, and we figured it'd stand up really well if the basement ever decided to flood. Through a friend of a friend, we received instructions on how to DIY the staining. Thus began the nightmare that is our basement floor.


When we pulled up the carpet and lino from the basement floor, the concrete was extremely damaged. The people who laid in the carpet previously nailed the tack strip (this runs along the edge of the wall to hold the carpet down) into the concrete. So when we pulled up the nails, each nail popped out a little hole of concrete. Then we pulled up the lino, which was apparently superglued to the floor. It left behind most of the papery backing of the lino, or just squiggles of yellowed glue. There were also cracks, paint stains, and bits of pine straw that had been laid in with the concrete. Here is the before picture with all the carpeting removed:


Well, we had two options. Option #1 was to pour a self-levelling concrete onto the floor to resurface it -- easiest option, however we would have had to wait 30 days to stain the floor (had to wait for the concrete to completely cure). Well, we didn't want to wait 30 days -- we, the all-knowing homeowners, thought we could get EVERYTHING done within a month and be all set. If only we'd known then! Option #2 was to clean the floor, fill in the cracks and pockmarks from the tack strip, grind the concrete to make it smooth, clean it about 4 more times (with NO chemicals -- just water), and THEN stain it. So we decided to do that. Well. We poured Quikrete into the holes and cracks. The grinding was horrible. It was extremely dusty, so D & Thomas came up with the idea of using it as a wet grinder (one person grinds while the other uses a hose to spray the dust down). We had to stop every few minutes to suck up all the water with a shop vac, and empty the vac every so often. Quikrete apparently doesn't bond properly with real cement, so it popped straight back out of the holes. 6 hours later, the floor was grinded (ground?). We found the right kind of concrete to use, and applied that to the holes. Filling them using a putty knife wasn't working out so well, so we tore up our hands mashing it into the holes. Piece of cake, right? So we did the next step, scrubbing away. D went to a specialty store in Duluth to get stain and sealant and applied both to the floor. Here is how it looks now:


Amazing, right? Not. You can't really tell from the picture, but the places where the holes and cracks were filled are super dark -- it looks like a row of misshapen polka dots around the perimeter of the room and around the doorways (there were squares of lino in front of the back and garage doors, so the carpet tack strip ran around those squares). There are some places where the holes weren't filled in 100%, so it looks uneven. Some of the grinding marks showed up. All in all, we weren't too happy about the final result.


As it stands we're considering a few options. The first is to resurface the floor, wait 30 days, and restain it and see how it looks (although I'm not too impressed with the way the stain turned out). Secondly, we can resurface and use concrete paint to paint the floor. Third, we can refrain from the resurfacing and just paint the floor. I think we're going to start off with the third option for now, and test some spots to see how it looks (if the unevenness shows up, we'll move on the resurfacing the floor!). We'll do another post to show the final results as soon as we get to it!